MayaCE3 Tutorial 2: Exporting animation
Now that we’ve got our character into Sandbox, it’s time to export some animations. This tutorial assumes you followed precisely the previous tutorial.
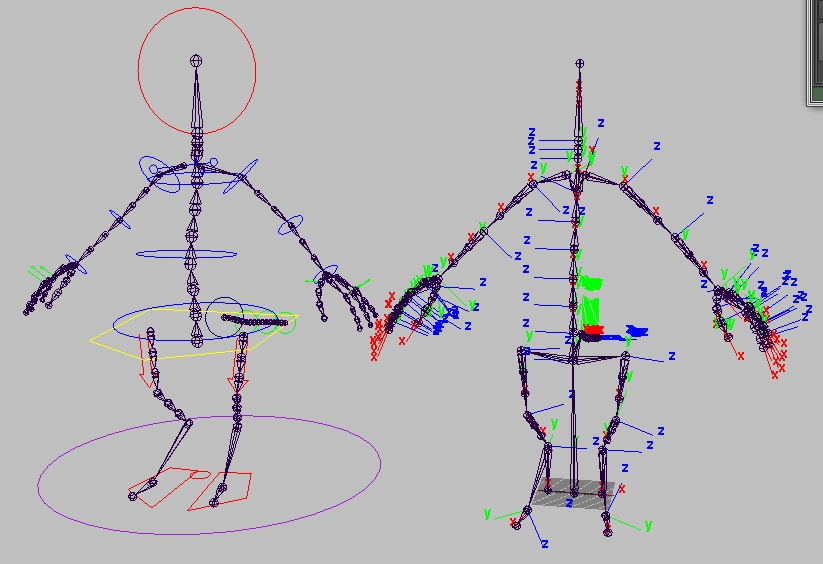
In my current Maya scene I have:
- The master skeleton, which is the animation rig (on the left).
- The slave skeleton, which is the actual deforming skeleton to which the geometry is bound (on the right).
The slave setup is a simple FK skeleton derived from my animation rig (the master skeleton). Its joints are driven by the master skeleton’s joints through the use of parent constraints. But if you intend to do the same, make sure that the Bip01 joint (the root-joint of the slave skeleton that sits on the ground in-between the legs) is only driven by a point-constraint.
Note: The Bip01 joint should only receive translation information, not rotation nor scale!
Be aware that when you export an animation, the character itself (mesh + skeleton) will NOT be exported; only the animation information on the joints (.caf file). So you must first export the character (as described in the previous tutorial) before you export animations for it.
Note: In order for an animation to work on a character (.chr file), the character must have at least the same number of joints (named the exact same way). But interestingly it can also have additional joints!
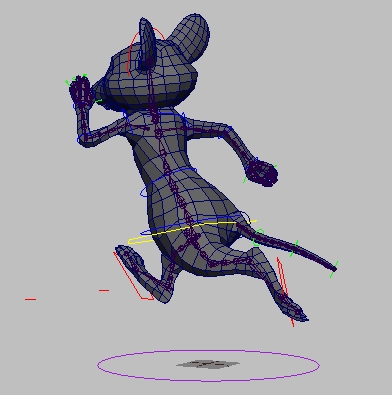
I will now proceed to export a run cycle for my character. But first, remember that if you animated your character on the spot for ease of animation, you need to actually have the character move through space. If you forget this, the CryEngine will complain that the “animation has no speed”!
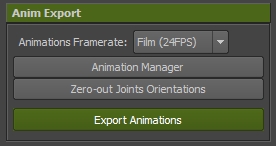
1) Define the frame rate:
The first thing to is define the frame rate at which you’re animating. In this case, since I key-framed my animation I used 24fps. MayaCE3 will convert everything to NTSC at export time, so you don’t have to worry about that.
Note: If you work at 24fps it is recommended to add a key before the first and after the last key of your animation in order to avoid a “pop” in the loop. This is due to an unavoidable artifact of the time unit conversion.
2) Create the animation clip:
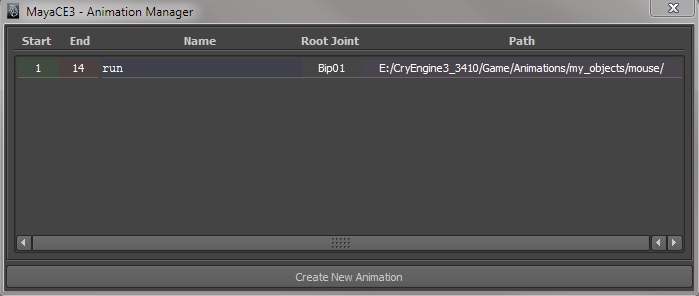
Click on “Animation Manager” and click on “Create New Animation“.
Input the information regarding the animation clip you want to create. Note that if you already have exported your character before and then clicked on Save Preferences then the Path field will be automatically filled up for you.
Note: At this point it is important to realize that the …/Game/Animations directory should be a mirror of your …/Game/Objects directory. So if I have a character exported in …/Game/Objects/my_objects/mouse then I should have a similar structure in …/Game/Animations/my_objects/mouse. If this is not the case, then the animation export will fail!
Also, you need to make sure that the official Crytek Animations.cba file lives in your …Game/Animations folder. This file gets automatically updated by MayaCE3 with your custom characters/animations info.
The information you entered will appear in the list of available animation clips.
3) Export the animations:
Click on “Export Animation“. If everything goes well, the compiler window will pop up and the .caf file will be created. MayaCE3 will also take care to automatically update the Animations.cba file and the .chrparams file.
4) Check you animations in Sandbox:
Load Sandbox (or close it down, then re-open it). Then open the Character Editor and load the character. On the left-hand side, in the Animations list, your animation should be available (in that case “run”).
Just click on the animation to see the result.
In the next tutorial, we’ll deal with replacing the player character with our own custom character…


Hi Seith,
Thank you very much for the scripts and tutorials. Very informative.
I’m having a error saying “Root bone ” could not be found”. I have no idea whats causing this. any thoughts.
Cheers mate.
@Sean
Never Mind, I figured it out. I have the skeleton in the character group. My apologies and thanks again.
Hi Seth, thanks for all your help!!, youre the only person to have made some sense of importing a custom character to sandbox.
I couldnt find any help anywhere else.
Hi Seth, can you please elaborate on :
“remember that if you animated your character on the spot for ease of animation, you need to actually have the character move through space. If you forget this, the CryEngine will complain that the “animation has no speed”!”
I’m trying to animate position of an animObject in the trackview. It works in the sandbox but not in game.
TIA
Hi Jack. What I meant to say is that when your animation on the spot is done, you should use a global control (usually driving the Bip01 root joint) and key it to actually drag the character through space (in order to match the feet placement). If you don’t do that, the locomotion editor is unable to deal with your animation because to its eyes your animation has no speed. Hence it won’t be able to mix and blend between other animations.
In other words the CryEngine only deals with animations that are developed through space (not on the spot). Now Unity has no problem with animations on the spot, but that’s neither here nor there…
I hope that clears up the confusion. Please bear in mind that all this is from my memories working with the engine; some things might have changed since then.
Thanks for the reply. Interesting, so CE3 looks at the position of Bip01 and fixes the ‘jump’ that would occur in the loop? I guess I’ll try this and see if it fixes my problem… The CE3 docs on the track view mention position animation on a BasicEntity. It seems wasteful that position can’t be animated on an AnimObject. What if I want to recycle a player animation inside a cinematic? (i.e. walk to point A then play a custom animation)
I’ve got experience with Unity and it’s an excellent engine, but you really can’t beat the lighting in CE3.
I understand you may not have time for delve into this, but here’s a link to my problem thread. http://www.crydev.net/viewtopic.php?t=110251