Crysis parallax mapping using Crazybump
Tools needed: Photoshop, Sandbox2 and Crazybump.
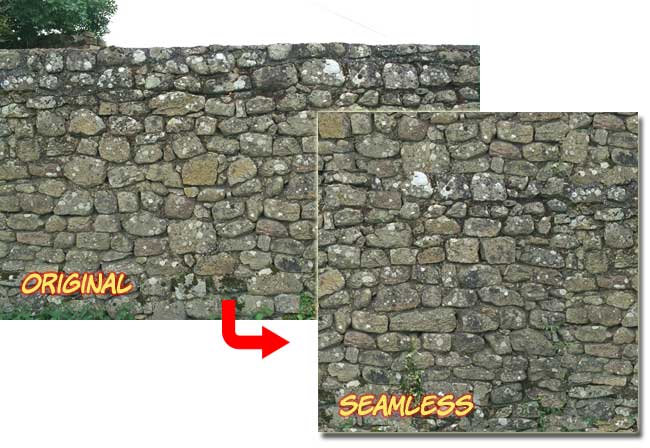
First, find a texture you like and make it seamless, so you can use it on very large objects. To make a texture seamless in Photoshop, go to Filters->Other->Offset and type in values that are half of your texture size. That way the meeting edges will appear at the center of the picture and you can work on merging them with the stamp tool.
Note: The texture has to be a multiple of 2, in other words a square, not a rectangle (eg: 512*512, 1024*1024, etc…). The maximum texture size is 2048*2048.
Save your texture as a ping (.png) file and import it in Crazybump (Crazybump doesn’t like layered .psd files). Play with the settings in the Normals tab until you get something you like. The displacement map (in the Displacement tab) is what is going to be used in Crysis for the parallax effect; the amount of “depth” of the texture. The Specularity tab is self-explanatory and you can disregard the Occlusion map (not used in Crysis). Then save the normals and specular maps as targa (.tga) files.
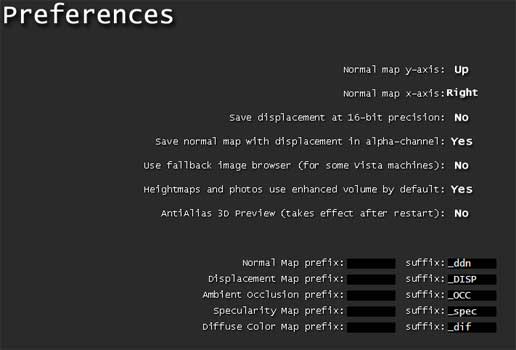
Note: In the Crazybump settings, make sure the displacement map is saved in the alpha channel. If you don’t do that, you won’t get the parallax effect in Crysis. In other words, you DO NOT need to save the displacement map on its own, since it will be included in the normals map. Also, input the correct suffixes for the appropriate maps, so you don’t have to rename them later on!
Now install the Crysis Tools to get the CryTIF Photoshop plugin (for CS3 and CS4). This will allow you to save the texture as a .cryTIF file so that it’s optimized for the Crysis engine. In any case, the Targa format will not yield predictable results, so you really shouldn’t use it.
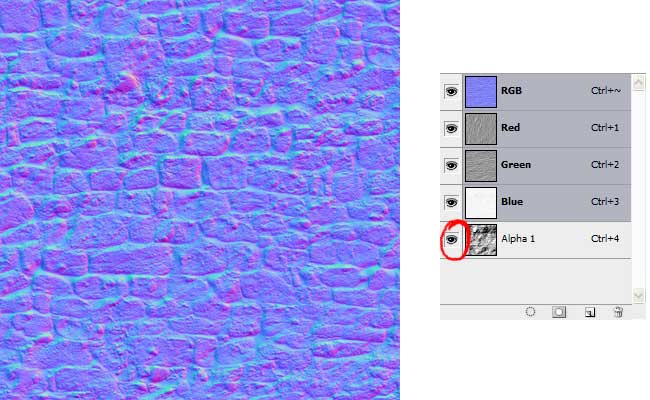
Before you save the texture, check that the alpha channel indeed stores the displacement information. Choose the CryTIF format (NOT the normal TIF format!). That way the .dds textures used by the Crysis engine will be automatically created. Finally, in the Preset pull-down menu, choose the type of map you’re saving.
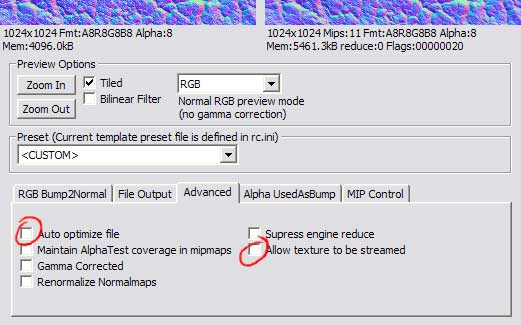
Note: If you want your texture to look its best for testing purpose, then tell the CryTIF plugin to not compress the file when creating the .dds by going to the Advanced tab and unchecking the “Auto optimize file” and “Allow texture to be streamed” check boxes.
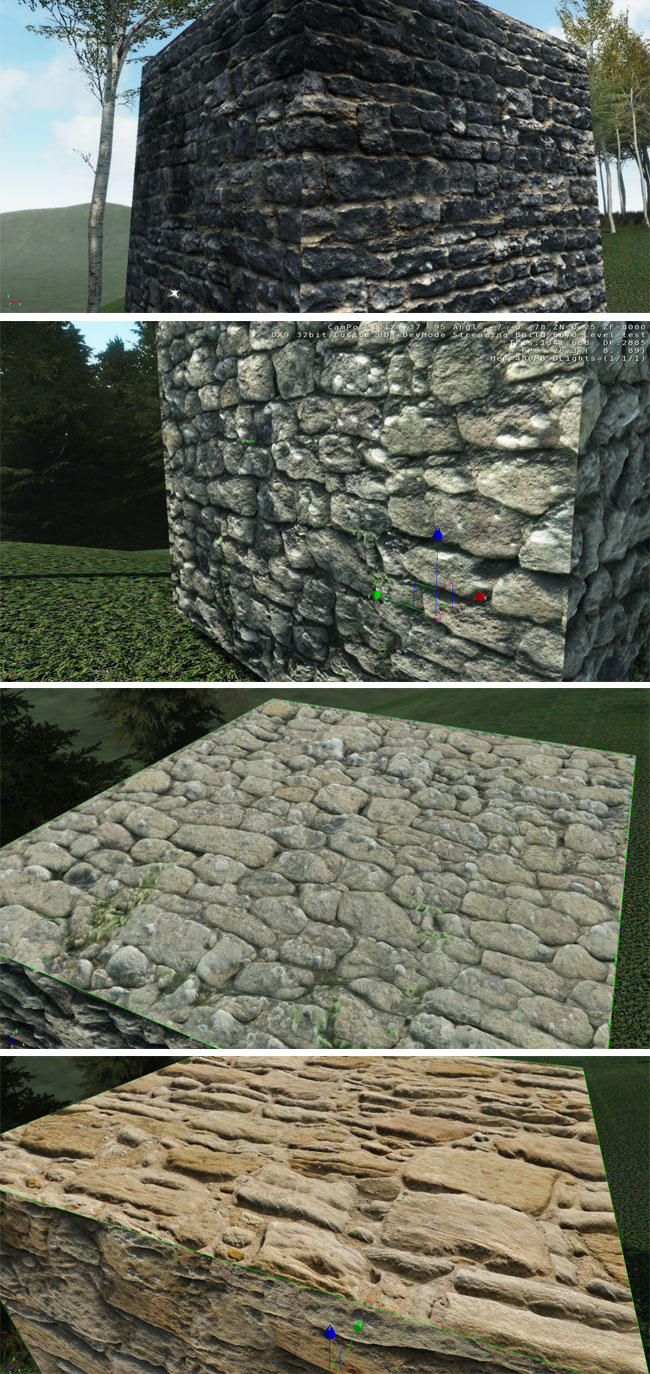
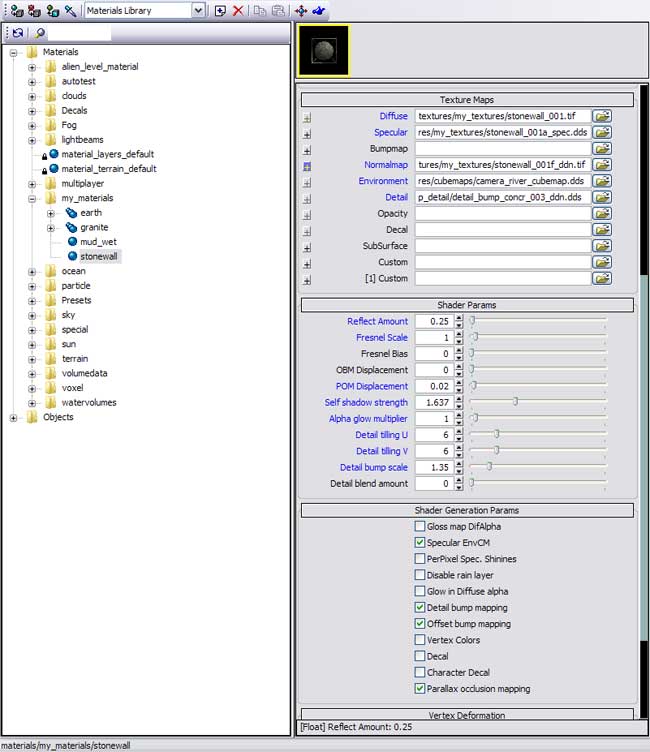
Then create your material in the Crysis editor and import your .dds textures. You can use the following settings for the material:
Note: When you apply your texture in Sandbox 2, sometimes the parallax effect disappears. In that case just close the editor and reopen it.
Don’t forget that your texture will look very different depending on the light and angle under which it appears. So play with the settings in Crazybump until you obtain a pleasant result but check often in Sandbox2 to get a sense of the final result! Also, don’t go overboard with the displacement map; the effect should remain somewhat subtle!