MayaCE3 Tutorial 3: Replacing the player model with a custom character
This tutorial will show you how to replace the player model with an entirely new custom character with its own custom key-framed animations. Brace yourself, things will be more technical than the previous tutorials. We’ll only deal with the model in a third-person view (camera over the shoulder).
So I have in my scenes a bunch of animations ready to be used (move forward, left, right, back, etc…). As explained in the previous tutorial I have exported and checked them in the character Editor.
Note: Since we’re going to replace the player model, don’t forget to add a weapon joint called “weapon_bone” to your character’s skeleton (as a child of the right hand’s joint).
1) Create a .cdf file for your character:
This is easy. Just load your .chr file in the Character Editor and simply do a File->Save As. This will save it as a .cdf file (which itself refers to the .chr file). This is necessary because many functions we’re going to use only deal with .cdf files.
2) Create a Locomotion Group:
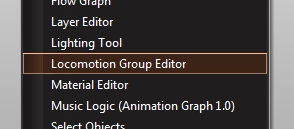
We’re going to start by creating a locomotion group. First, open the Locomotion Group Editor:
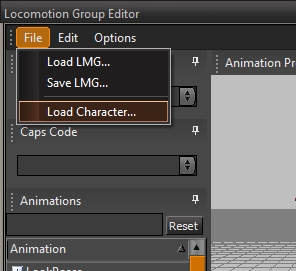
Then go to File->Load Character:
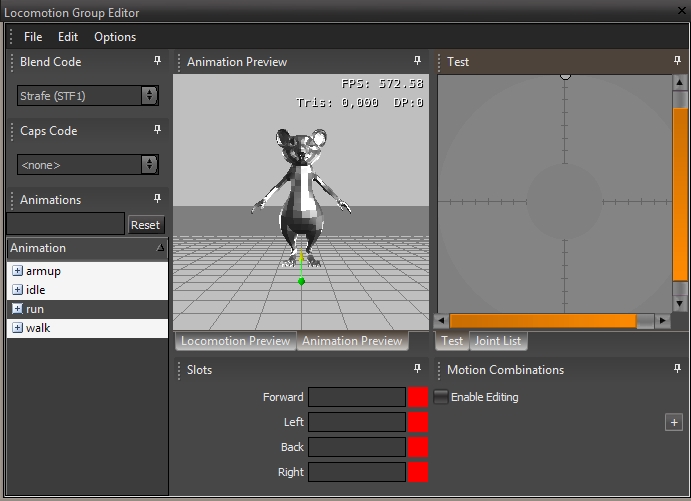
If everything goes well, you should see the list of available animations on the left-hand side.
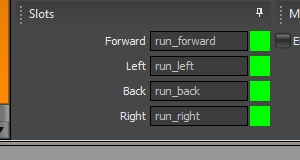
Now we’re going to drag and drop our animations in the relevant slot, like so:
If there is a red square instead of a green one, hover your mouse over it and you’ll get some information about the problem.
You can test how the animations blend together by clicking on the “Locomotion Preview” tab and moving the joystick cursor (in the “Test” tab) around. If you see some weird scaling or deformations it means you should troubleshoot the animations individually in the Character Editor. Or maybe you dragged an animation to the wrong slot.
Finally, save the locomotion group. In this case I saved it as “run_relaxed” in …\Game\Animations\my_objects\mouse\LMG.
3) Add the Locomotion Group to the .chrparams:
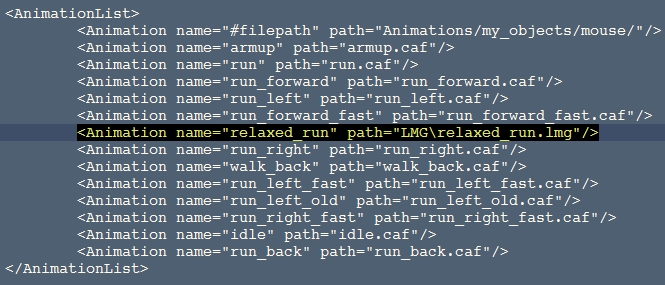
Now we need to add manually the LMG to the list of animations in the character’s .chrparams (located in this case in: …\Game\Objects\my_objects\mouse).
Note: The locomotion group can be considered itself as an “animation”, even though it in fact calls a bunch of existing animations.
4) Define the IK handles:
In order to benefit from the cool procedural IK behaviors of the CryEngine (legs and feet adapting automatically to the ground plane to avoid intersection) we have to define the IK handles. We also do this in the .chrparams file by adding a block of code within the Params element:
<IK_Definition>
<LimbIK_Definition>
<IK EndEffector=”Bip01 R Hand” Handle=”RgtArm01″ Root=”Bip01 R UpperArm” Solver=”2BIK”/>
<IK EndEffector=”Bip01 L Hand” Handle=”LftArm01″ Root=”Bip01 L UpperArm” Solver=”2BIK”/>
<IK EndEffector=”Bip01 R Foot” Handle=”RgtLeg01″ Root=”Bip01 R Thigh” Solver=”2BIK”/>
<IK EndEffector=”Bip01 L Foot” Handle=”LftLeg01″ Root=”Bip01 L Thigh” Solver=”2BIK”/>
<IK EndEffector=”Bip01 Neck” Handle=”Spine_SpineToNeck” Root=”Bip01 Spine” Solver=”CCDX” fStepSize=”10″ fThreshold=”10″ nMaxInteration=”15″/>
</LimbIK_Definition><FeetLock_Definition>
<RIKHandle Handle=”RgtLeg01″/>
<LIKHandle Handle=”LftLeg01″/>
</FeetLock_Definition>
</IK_Definition>
Pay attention to the names of EndEffector and Root here; they need to match your character’ skeleton joints exactly!
5) Create an Animation Graph:
To create an animation graph from scratch can be very a very daunting task. Which is why we’re going to use an already existing one…  Thankfully, the good people at Crytek have forgotten an unused graph file which will work fine for our purpose. Open the Animation Graph and load the graph called “GirlTest.xml”.
It will complain that the character it refers to doesn’t exist, just click OK.
The first thing to do is to tell the graph to use our character. To do so, go to View->Preview Options.
This will bring up a panel to the right where you can substitute your character:
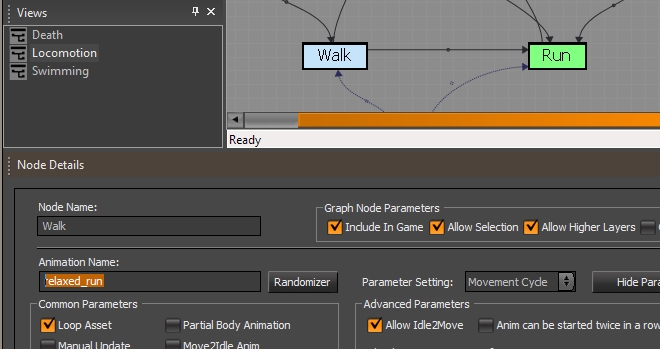
Next click on Locomotion (in the Views palette). This will show the locomotion diagram (we only care about Walk, Run and Idle). Then click on Walk (or Run) and input you locomotion graph name into the Animation Name field:
You’ll have to do the same thing for both the Walk and Run nodes. Do it also for the Idle node, although you’ll notice that for that one a random modifier is in effect. Click on the Randomizer button next to the animation name and replace all the animation fields in the popup window by your Idle animations. Or if you don’t care for the randomizer, just input the name of your Idle animation intead of “<RandomSet:…>”.
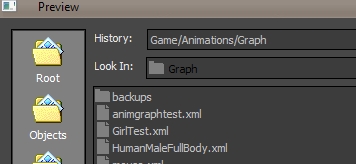
Don’t forget to save the animation graph as the name of your character (I called it “mouse.xml”) alongside the other graph files in …/Game/Animations/Graph.
6) Replace the player model:
To replace the player model, we’ll need to tweak the text file called “player.lua” located in …\Game\Scripts\Entities\actor. Replace the AnimationGraph and UpperBodyGraph with the anim graph you just created.
In the Properties section of the file, change the fileModel and clientFileModel to point to your .cdf file.
Note: You HAVE to use the .cdf file, NOT the .chr file!
This will make sure the third-person model and the shadow are those of your model. You may want to also change the first-person models, but this is beyond the scope of this tutorial.
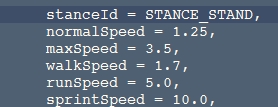
Incidentally you can also tweak the speed values to better match the speed of your animations:
You can also place the camera slightly to the side of the character, so we don’t just stand right behind it:
In this case, I have moved the camera 1 meter to the right of the character (in X).
Finally, launch Sandbox (or close it first if it was open) and press CTRL+g to jump in-game. Then press F1 to switch to third-person view and take you character out for a walk… 
You might want to use this console command:
ca_DrawLocator 1
It’ll draw a green line for the direction of your character and a yellow one for the speed.
And that’s it. Let me know if you have any question…





You are hooking me back again in CE3 i really hate you. LOL
Super Thank for your Great Tutorial.
Looking for another Great tuts.
can you share with us files from this project ?
thx
Unfortunately those are not assets I can release at this point, but anyway you’d be better off having a look at Crytek’s official Maya sample files (that’s what I did) which you can find at the bottom of this page: http://www.crydev.net/dm_eds/download_detail.php?id=4
Hello,
I would like to know if you could help me. I work on the project Crash Bandicoot Returns, unfortunately, I did not at all used to create characters and even less to export.
However, I have the final model for the game but now I want to export it in the CE3. However, for some reason, I can not do it. Could you help me or even that you exported it for me?
Me you would of great help. For months I go crazy because of it. And the community following my project beginning to be tired of waiting.
Thank you in advance for paying attention to my request.
(Sorry for my poor english)
Lenox
I’m sorry but I really wouldn’t have time to work on your character, Lenox. However I have posted some detailed tutorials about exporting a player character from Maya to Sandbox which you’ll find under the “Games” section of this site.
@Seith
Unfortunately I work with 3ds max. I’ll try to find the solution myself. Thank you anyway.
Great tutorial, thanks a lot. I had been looking for this for quite some time. I personally despise the CE3 docs, so a descriptive, easy to follow tutorial is just what i needed. +Rep
Hello. First I ‘d like to thanks for the great tutorial. And I need some help.
When I droped an animation in to a slot. The red square didn’t turn green. And the error is “animation has no speed”. How can I fix this, please?
This probably means that the character is animated on the spot. It should actually travel through space (you could parent the rig to a locator and animate the locator, or any other high-level control of your animation rig).
Thank you for your quick reply . I ‘ll try this.
Hi seith awesome work! I ve a little question..Is it possible with that to replace the custom model so that I can use it as a normal AI for istance?…In this case how the pipeline does it change?thanks
Hi Garrus. Yes, the concept would be the same, but the script files to modify would be slightly different. For example instead of “Player.lua”, you would have to modify “Grunt_x.lua” in order to point it to your custom model and anim graph. But the rest of the method would still apply.
Hi Seith Thank you for fast reply!that puts me in a little dubt..do u think It’s possible to copy grunt_x.lua and rename it with my model name?in other words is it possible(after modifications in lua) to have both grunt and my custom in the same level or the change does exclude it?thank you in advance
You are correct. If you make changes to Grunt_x.lua, all the game’s enemies will indeed be replaced by your custom model. In order to have both your custom character AND keep the grunts you’ll have to create a new class of enemy, which involves recompiling the CryGame.dll file (using Microsoft Visual C++ Express).
Thank you vm..just as I feared..anyway you did enlight me..now I hope I m still up to use visual c++ strange that cryengine doesnt have a button to add a new entity class!maybe in the future!see you seith and thank you again!
You’re welcome, Garrus. As to adding a class, it’s actually quite simple (I don’t know how to program in C++ and yet was able to do it!).
Hi Seith, thanks, no problem with compiling and btw, I found a thread on crydev where you explain the other steps clearly. So, just to resume:
1)Text editor for gameDll.rc and change ALL #include “afxres.h” to #include “windows.h”
2)Copy and replace Cryengine_gamecodeonly.sln from crymod to Game\Code\solutions
3)Open it with VS C++(I ve ultimate version so I had no matter with x64 platform), change line 132 in gamefactory.cpp with REGISTER_FACTORY(pFramework, “custom_skel”, CPlayer, true).
4)in \Cryengine\Game\Scripts\Entities\AI I did duplicate grunt.lua and grunt_x.lua and rename as custom, open them and replace ALL reference from grunt to custom.
5)rebuild crygame.
Now I did open the editor and I can see my new AI in entity->AI, I did place it in the viewport(omg he’s a grunt!), I change my custom cdf with it but the editor doesnt recognize my animationgraph.xml. Maybe I need a new .ent file or a .cal file for my custom?At the moment I ve only a LMG and a .xml for my custom. Thank you very much!
sorry, my fault, anim graph works perfectly, the problem was elsewhere…bye and thanks for this awesome solution
I did everything right, but when I put the character to move in any direction recognizes only the first frame of the movement. What should I do?
@JP
i fixed, but now the moviment animation is not looping.
@JP
Everything is fixed now.
xD
Hi Seith,
Im stuck on adding animations in the locomotion group. I keep getting the ‘animation has no speed message’ even though my dogs walk cycle animation is moving in the eniviroment and not in one spot (as you said to avoid). To make the dog move along as he’s walking i chose to keyframe the root bone to move through space. Is there another solution to this problem as this is stopping me from replacing the default charcter model now. Any guidance would be much appreciated. Thank you.
Fantastic! Maybe you could say in a few words how you did it, so that other people can benefit from it…
Hi Rohin. I’m sorry, I don’t see anything else. Root movement is usually what causes this issue. Are you sure that Bip01 is the joint that actually gets the overall translation movement?
Hello, i’m using cryengine 3.8.5 and i changed the player.lua file with my custom character but inside the engine it still shows the default game character. i searched alot and did everything i could found but still nothing changes can you help please??
Hello Alaa. I haven’t installed/used the CryEngine for several years now (moved to Unity), so I’m sorry but I really wouldn’t have the first idea where to begin!
@Seith i’ll try and look somewhere else.
ok thx mate
hey bros….some tut for 3ds max please?
I don’t use 3ds Max, sorry.