MayaCE3: How to build a cryEngine level directly in Maya
Last update: 8 of June 2012.
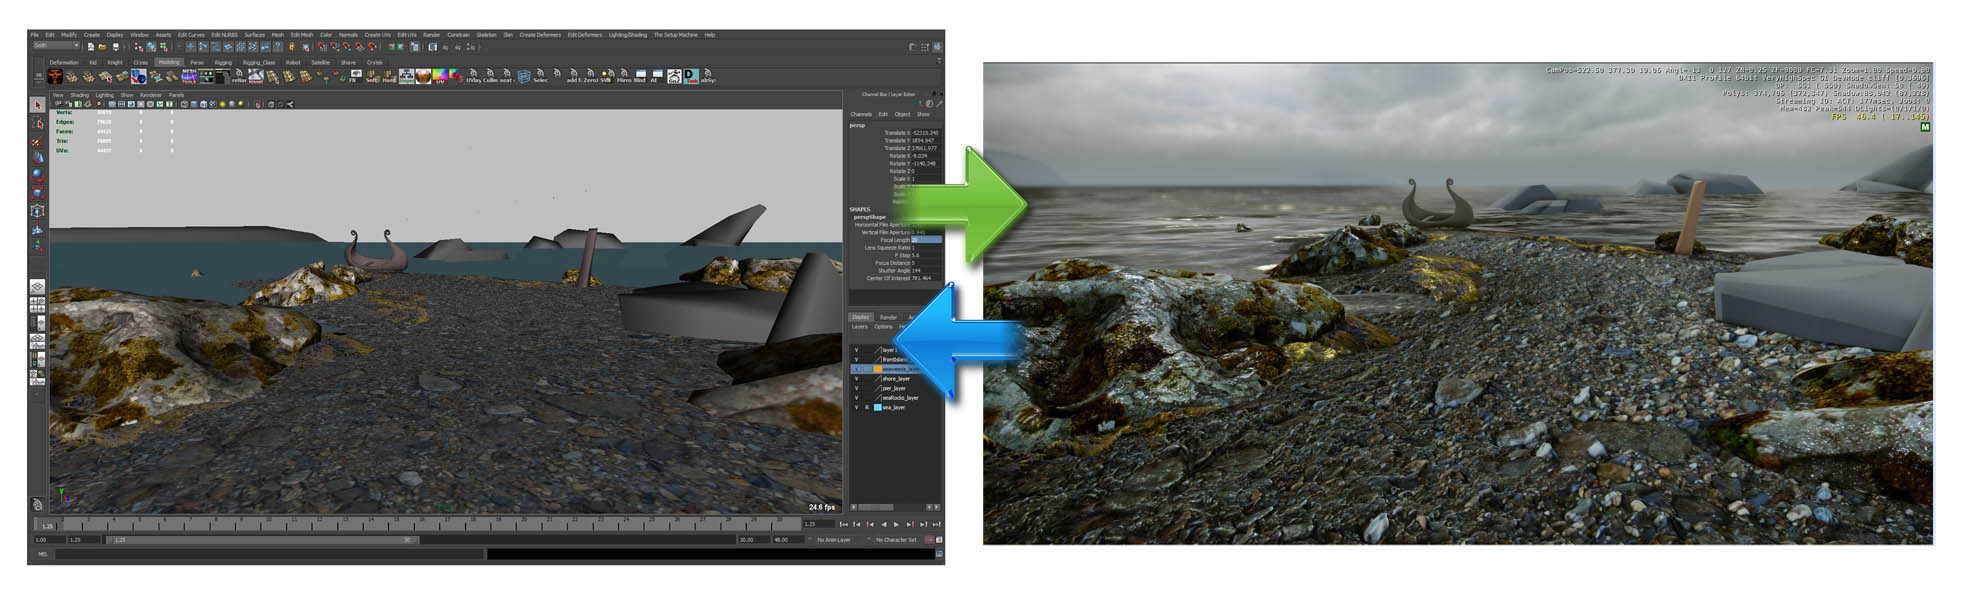
First, let me state the obvious: you will be able to build your level’s scenery in Maya (models, visuals, etc…), not the logic part (AI, gameplay, etc…). Which brings me to the most important rule you need to remember: All the assets (the “cryexportnode_*” groups) you use in your sandbox layer should live in your Maya scene, as well as their material groups.
For now the MayaCE3 2.x.x beta only supports Brushes (static models), Decals and Vegetation.

For all intents and purposes, Sandbox layers and Vegetation layers work more or less the same way. So what’s relevant to one is also relevant for the other.
Please note that the terms “asset” and “layer” I use throughout have nothing to do with a “Maya asset” or a “Maya layer”. So here’s a small glossary of the terms I use:
What is an “asset”?
An asset is a model contained in a cryexportnode group. You HAVE to first export that model (and its material group) to the cryEngine by clicking on “Export Select Model” before you can use it successfully in a sandbox layer.
What is a “sandbox layer”?
It is a simple group with special attributes and orientation that allow it to act as a cryEngine “world space” for your layer.
What is a “dummy mesh”?
It is a special copy mesh of the model contained in a cryExportNode. It gets automatically created when you “send” an asset to a sandbox layer for the first time.
Remember: Before you can use an asset in your sandbox layer, you have to export it! But the cryEngine does NOT support upper caps (don’t ask), so only use lower caps in your cryexportnode AND material names. Also, even if you have exported your asset with a previous MayaCE3 version (prior to 2.0.x) you must re-export it!
How do I create a sandbox layer?
Click on “Create Sandbox Layer” and enter the name of your new layer. Then click on “Ok”.

How do I create a vegetation layer?
The same way you create a Sandbox layer.
How can I use an asset in a sandbox/vegetation layer?
In order to use an asset in a sandbox/vegetation layer you must first “send it” to said layer. You only have to do this once. After that, you can just duplicate an existing copy like anything in Maya.
So click “Send Asset to Layer“. You will get a window like this one:

Simply select the asset (in the list of all the cryExportNodes that currently live in your scene) and select the sandbox layer you want to send it to. Then click on “Do it!“. A special dummy mesh will get created in the sandbox/vegetation layer you chose.
Important: This has to be done only the first time you send an asset to a specific layer (see next paragraph).
Do I need to do this every time I just want to duplicate an existing dummy mesh?
No. If you’ve already sent an asset to a layer by using the above method, you can now just duplicate (CTRL+d) the dummy mesh to your heart’s content. Again, you only need to click “Send Asset to Layer” when you want to use an asset that has never been sent to a specific layer before. All the dummy meshes should live directly within the sandbox layer, like so:

The Golden Rules:
- Do not group assets within a sandbox layer. Every mesh should live as siblings in your sandbox layer group. Again, no grouping within a sandbox/vegetation layer!
- Do not freeze the transformations of your dummy meshes!
- Never freeze the transformations on a sandbox layer!
- Do not rename the dummy meshes within a sandbox layer!
- The Crytek plugin does not support upper caps, so only use lower caps in your cryexportnode name.
- You must export your assets to a path that contains a “…/Objects/…” directory.
- You must name your material group the same name as your asset (eg.: “airplane” for “cryexportnode_airplane”). Same as the asset name, it should all be in lower caps!
You can rotate, scale (uniformly) and translate the dummy meshes as you wish. Again, just use CTRL+d to duplicate existing dummy meshes.
How do I export my sandbox layer?
Click on “Export Sandbox Layer“. Then navigate to the directory where you want to save your layer. Either choose an existing layer to overwrite it or enter a new layer file name.
What about Decals?
Decals are not created directly in Maya. Instead, you create them normally in Sandbox and then they can be imported in Maya as parts of a Sandbox layer. After that, you can duplicate those decals as usual.
How do I import the layer within Sandbox?
Go to the Layer tab of the RollupBar and click on the icon on the right. Then navigate to the directory where you previously saved you layer.

Double-click your layer file and if a layer with a similar name already exists within your Sandbox level, a warning will appear.

Confirm the action and your layer will be imported.
How do I import a sandbox layer into Maya?
First, export the layer from Sandbox. Then, in MayaCE3, click on “Import Sandbox Layer“. Then navigate to the directory where you exported your layer from Sandbox.
Important: If a sandbox layer with a similar name already exists in your Maya scene, it’ll get deleted and replaced by the layer you import.
Can I import a sandbox layer in Maya even if I don’t have all the original assets in my current scene?
Yes. If you try to import a sandbox layer but you don’t have the source assets (the cryexportnodes) present in your current scene, the layer will get imported anyway, but the missing models will appear as yellow spheres. Besides this side-effect however, all the data (position/rotation/scale, etc…) of the missing models are preserved. It means you can re-export the layer from Maya and import it into Sandbox again without losing anything… 
Troubleshooting:
Some of my objects show up with a yellow shader in Maya!
This means MayaCE3 cannot find the specified material to apply to the objects. Double-check that the material group exists.
Some of my objects show up as yellow spheres in Maya!
This means the source asset (cryexportnode) for these objects is not present in the current scene.