MayaCE3 Tutorial 1: Exporting a character from Maya to the CryEngine3
This tutorial will show you the basic workflow to export a skinned geometry to Sandbox3. To install MayaCE3, follow the instructions on this page.
Here’s what’s needed in your scene to follow this tutorial:
- Geometry
- Skeleton
You’ll also need of course:
- MayaCE3
- The latest CryEngine 3 FreeSDK.
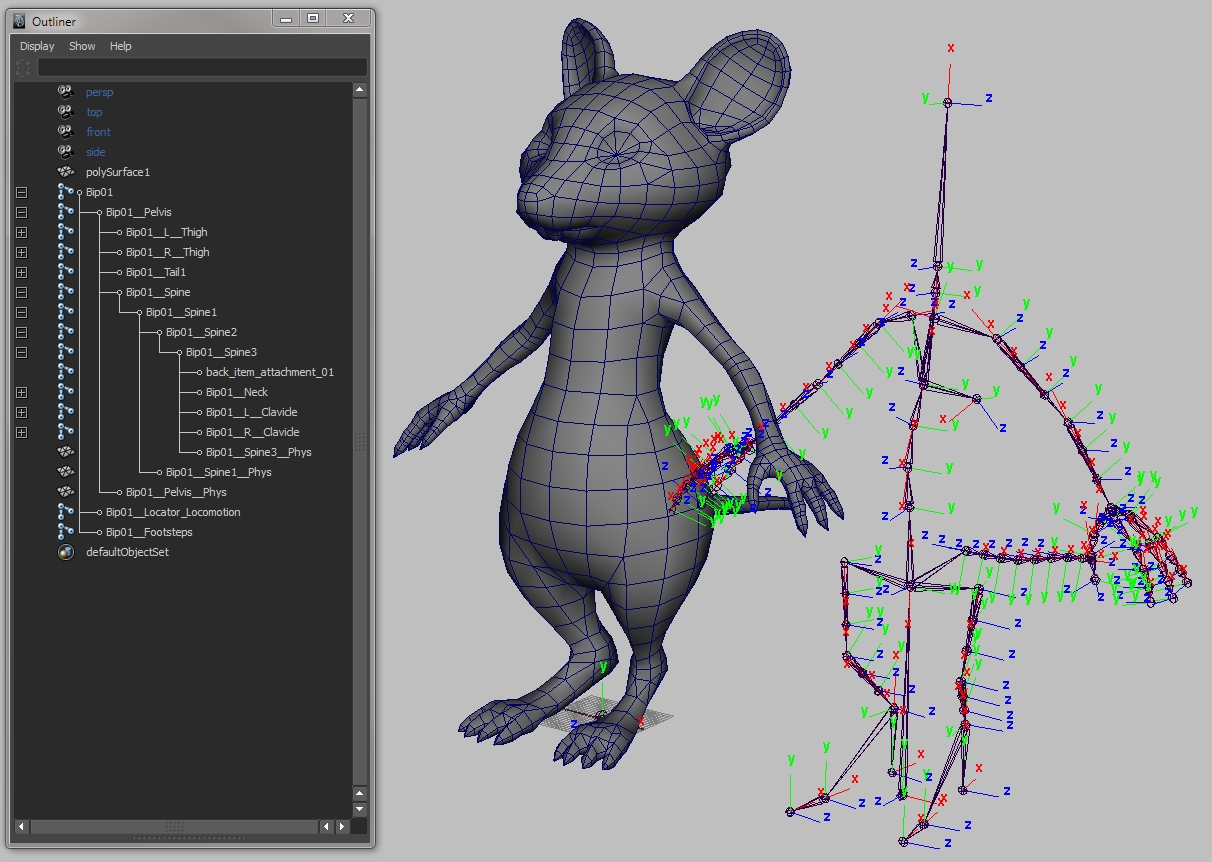
The geometry is a polygon mesh. The skeleton is a simple FK skeleton. Note that you can save your scene outside of the “…/Game/” directory, as long as the export path itself points to a directory within the “…/Game/…” hierarchy.
Don’t forget to assign a shader to your mesh: In this case I have created a Lambert called “mouse_SHD” and assigned it to the geometry.
Note: You must create a specific shader for your geometry. The default Lambert won’t work for our purpose, since you cannot rename it!
Rigging requirements:
Note: In the previous versions of the exporter the character used to have to face the -Z axis with the +X axis to its right. This is no longer the case in the latest version of the CryEngine 3 FreeSDK.
If you intend on your characters to benefit from the procedural LookIk that allows the character to automatically turn its head towards its target, then you should make sure you’ve got the following joints in your spine: Bip01__Pelvis, Bip01__Spine, Bip01__Spine1, Bip01__Spine2, Bip01__Spine3, Bip01__Neck, Bip01__Head and Bip01__Look.
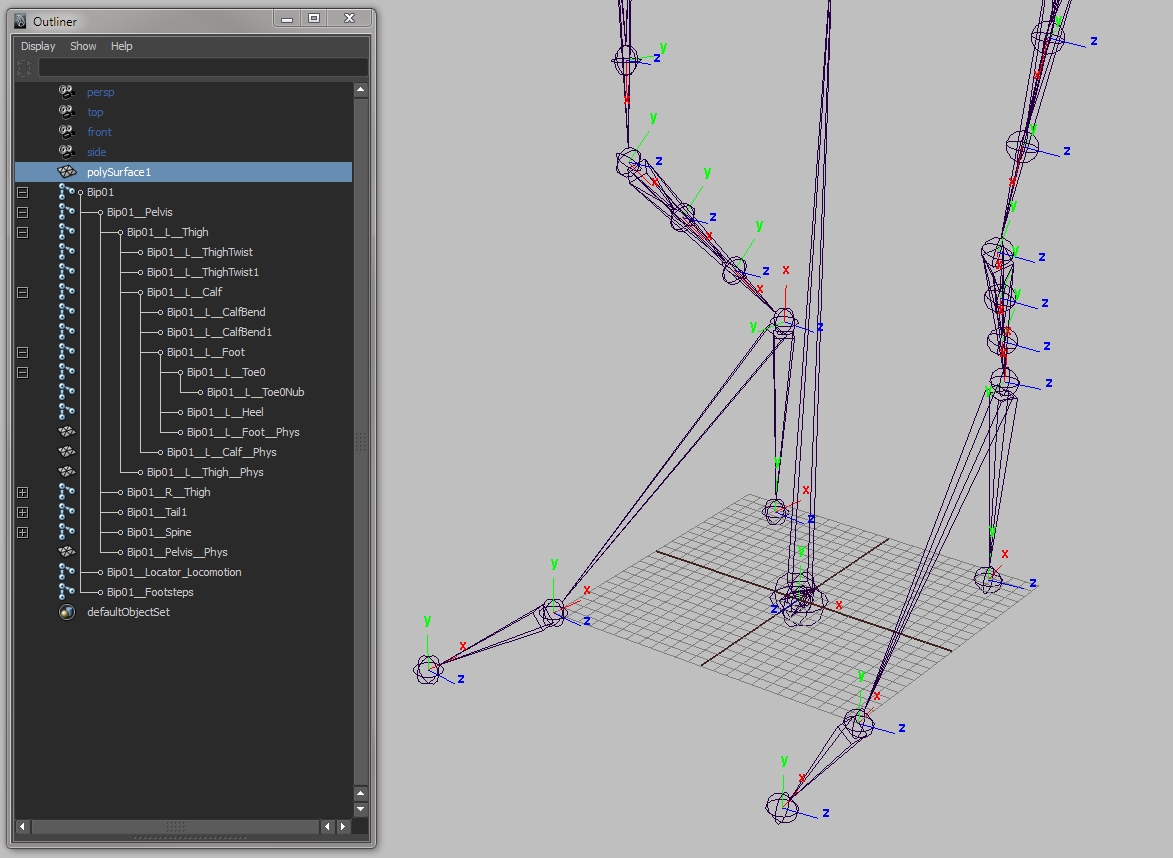
Pay particular attention to the way the foot and the leg are setup. In order to benefit from the automatic IK foot placement, make sure the foot joint is a direct child of the knee joint, and the knee joint is a direct child of the hip joint. You can use twist joints the way you like.
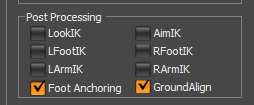
Note the orientation of the feet: this is important so the feet are automatically kept parallel to the ground surface by the CryEngine. You can check if your setup works by activating the “GroundAlign” checkbox in the Character Editor:
If the feet of your character instantly flip in a weird angle, then the foot’s -X axis probably doesn’t point straight down to the heel joint. You can test the IKs by checking the “LFootIK” box, then pressing the 4, 6, 8 and 2 keys on your keypad. CTRL+8 and CTRL+2 to move the IK up and down. Those key combinations are also used to rotate the ground plane.
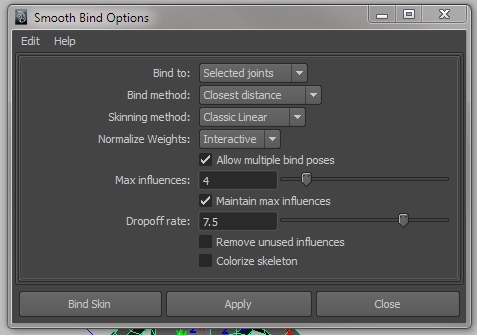
The skin is then bound to the skeleton using the following settings (in my experience, using Classic Linear works fine, but Crytek’s official documentation advises to use Quaternion instead):
If when you export you get an error message saying that a certain number of vertices have more than 4 influences (the limit for the CryEngine):
Then chances are you used the Mirror Weights function of Maya. Which works great, except it breaks the “Max Influences” setting for your skin (*glares at Autodesk*). In that case, just use this script: checkMaxSkinInfluences.mel (by David Hunt from Bungie) and call the main procedure with the name of the skin and the max number of influences, like so:
checkMaxSkinInfluences("mouse_MSH", 4);
This will select the offending vertices and you can then prune their weights with a very low value (0.001). And that should take care of the problem.
Note: The main root joint (located on the ground) should NOT be part of the skin cluster.
Physics:
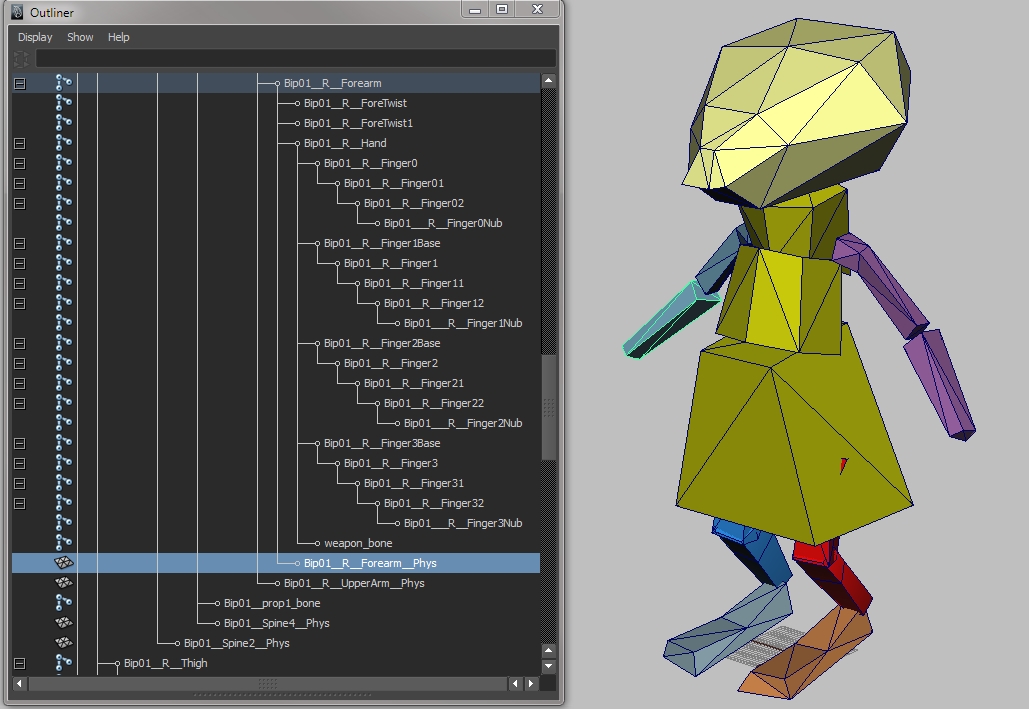
The physics proxies are simple mesh shapes that get parented to the export skeleton.
There are 8 shaders that should be reserved for the physics proxy of your character. They should be placed first in the material group, followed by the other shaders used by your character.
Note: Don’t try to add shaders for the hands, as they’ll cause the compiler to complain about not being able to find some sub-materials.
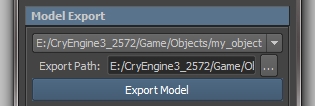
1) Define the export path:
That’s the directory where the character (the .chr file) will appear. In my case it is “E:\CryEngine3_2572\Game\Objects\my_objects\mouse”.
Note: This path MUST point to a directory located within in the …/Game/Objects/ directory.
At this point you can right-click on “Export Path” and choose “Add To Quick Paths” in order to store that path for reuse later on (even in a different scene).
Click on “Save Preferences“. This will create the CRYEXPORTSETTINGS node, which is a group used to store useful info on your scene setup. Never delete that node!
You also must make sure the Crytek compiler is correctly recognized. Click on “CryEngine Settings” and point to the base directory of the CryEngine (the folder where you copied the CryEngine 3 Free SDK).
The compiler will interpret your Maya model into a format that the CryEngine can understand.
2) Prepare the model:
Select the geometry and click on “Prepare For Export“.
This will create the appropriate hierarchy and material group for your model.
2) Create the .chrparams file:
Before you export the character, we’re going to create the .chrparams file, which contains info regarding the procedural LookIk I mentioned before, as well as a bunch of other things like IK limbs. You can use the following code as a basis for your own file:
<?xml version="1.0" ?><Params>

    <IK_Definition>
        <LimbIK_Definition>
            <IK EndEffector="Bip01 R Hand" Handle="RgtArm01" Root="Bip01 R UpperArm" Solver="2BIK"/>
            <IK EndEffector="Bip01 L Hand" Handle="LftArm01" Root="Bip01 L UpperArm" Solver="2BIK"/>
            <IK EndEffector="Bip01 R Foot" Handle="RgtLeg01" Root="Bip01 R Thigh" Solver="2BIK"/>
            <IK EndEffector="Bip01 L Foot" Handle="LftLeg01" Root="Bip01 L Thigh" Solver="2BIK"/>
            <IK EndEffector="Bip01 Neck" Handle="Spine_SpineToNeck" Root="Bip01 Spine" Solver="CCDX" fStepSize="10" fThreshold="10" nMaxInteration="15"/>
        </LimbIK_Definition>


        <IKTarget_CharacterSetup>
            <!-- This section contains optional additional data for this character when he is using the IKTarget System or the Procedural Object Interaction System -->
            <!-- every tag is optional, the default setup override the internals defaults and will be used for all limbs not specifically listed below -->
            <!-- armLength: value used for distance calculation - does not need to represent actual arm value - can be made shorter for effects -->
            <!-- endEffPullback: hand/finger thickness, the hand will be moved back by this automatically to avoid clipping (to adjust for the mesh around the bone) -->
            <!-- animLayer: use this layer for limb animations (hand or finger poses for example) for this limb -->

            <DefaultSetup armLength="0.51" xEffPullback="-0.9" yEffPullback="-0.03"/>
            <LimbSetup IKHandle="RgtArm01" animLayer="8" armLength="0.5" xEffPullback="-0.1" yEffPullback="-0.035"/>
            <LimbSetup IKHandle="LftArm01" animLayer="9" armLength="0.5" xEffPullback="-0.1" yEffPullback="-0.035"/>

            <!-- If a spine handle is specified, the Procedural Object Interaction System will use it. -->
            <!-- As with the arm length, the length for a straight spine can be manually set and can be shorter than the actual spine
                 to create an even stronger curvature when bending forward to increase the character's reach -->
            <SpineSetup IKHandle="Spine_SpineToNeck" spineLength="0.40"/>
        </IKTarget_CharacterSetup>


        <LookIK_Definition>
                <LEyeAttachment Name="eye_left"/>
                <REyeAttachment Name="eye_right"/>

                <DirectionalBlends>
                    <Joint AnimToken="LookPoses" ParameterJoint="Bip01 Look" ReferenceJoint="Bip01 Pelvis" StartJoint="Bip01 Look"/>
                </DirectionalBlends>

            <DefaultLookPose name="LookPoses_sdk_Head"/>

                <RotationList>
                    <Rotation Additive="1" JointName="Bip01 Pelvis" Primary="1"/>
                    <Rotation Additive="1" JointName="Bip01 Spine" Primary="1"/>
                    <Rotation Additive="1" JointName="Bip01 Spine1" Primary="1"/>
                    <Rotation Additive="1" JointName="Bip01 Spine2" Primary="1"/>
                    <Rotation Additive="1" JointName="Bip01 Spine3" Primary="1"/>
                    <Rotation Additive="1" JointName="Bip01 Neck" Primary="1"/>
                    <Rotation Additive="1" JointName="Bip01 Head" Primary="1"/>
                    <Rotation Additive="1" JointName="Bip01 Look" Primary="1"/>
                </RotationList>

                <PositionList>
                    <Position Additive="1" JointName="Bip01 Pelvis"/>
                </PositionList>
         </LookIK_Definition>


        <FeetLock_Definition>
            <RIKHandle Handle="RgtLeg01"/>
            <LIKHandle Handle="LftLeg01"/>
        </FeetLock_Definition>


        <AimIK_Definition>
            <DirectionalBlends>
                <Joint AnimToken="AimPoses" ParameterJoint="weapon_bone" ReferenceJoint="Bip01" StartJoint="Bip01 R UpperArm"/>
            </DirectionalBlends>

            <RotationList>
              <Rotation Additive="0" JointName="Bip01 Spine" Primary="1"/>
              <Rotation Additive="0" JointName="Bip01 Spine1" Primary="1"/>
              <Rotation Additive="0" JointName="Bip01 Spine2" Primary="1"/>
              <Rotation Additive="0" JointName="Bip01 Spine3" Primary="1"/>
              <Rotation Additive="0" JointName="Bip01 Neck" Primary="1"/>
              <Rotation Additive="0" JointName="Bip01 Head" Primary="0"/>

              <Rotation Additive="0" JointName="Bip01 R Clavicle" Primary="1"/>
              <Rotation Additive="0" JointName="Bip01 R UpperArm" Primary="1"/>
              <Rotation Additive="0" JointName="Bip01 R ForeArm" Primary="1"/>
              <Rotation Additive="0" JointName="Bip01 R Hand" Primary="1"/>
              <Rotation Additive="0" JointName="weapon_bone" Primary="1"/>

              <Rotation Additive="0" JointName="Bip01 L Clavicle" Primary="0"/>
              <Rotation Additive="0" JointName="Bip01 L UpperArm" Primary="0"/>
              <Rotation Additive="0" JointName="Bip01 L ForeArm" Primary="0"/>
              <Rotation Additive="0" JointName="Bip01 L Hand" Primary="0"/>
            </RotationList>


            <PositionList>
              <Position JointName="Bip01 R Clavicle"/>
              <Position JointName="weapon_bone"/>
              <Position JointName="Bip01 L Clavicle"/>
            </PositionList>

            <ProcAdjustments>
                <Spine JointName="Bip01 Pelvis"/>
                <Spine JointName="Bip01 Spine"/>
                <Spine JointName="Bip01 Spine1"/>
                <Spine JointName="Bip01 Spine2"/>
                <Spine JointName="Bip01 Spine3"/>
            </ProcAdjustments>
        </AimIK_Definition>

    </IK_Definition>


    <AnimationList>
        <Animation name="#filepath" path="Animations/my_objects/mouse/"/>
    </AnimationList>

</Params>
Note that the <AnimationList> element is empty, besides the path to the future animations. That’s alright, as MayaCE3 will fill up the animation list as we export them (in the next tutorial).
Save this file to the same directory you’ve chosen to export your character to (cf. Step 1), with the name [your character name].chrparams (in this case “mouse.charparams”).
3) Export the character:
Select the CryExport node and click on “Export Selected Objects“.
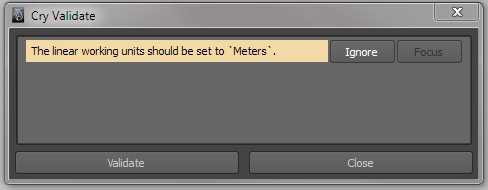
You might see this window come up:
In fact you may get warnings about the “working unit” which should be “Meters” instead of “Centimeters”, or the FPS needing to be NTSC (29.97) instead of “Movie” (24 fps). But you can actually safely ignore those. Just click on “Ignore” in front of each warning, but don’t close the window itself! If you do, it will just pop up again and you won’t be able to export anything.
Note: If the line’s background color is red instead of yellow, then it means you won’t be able to ignore the problem and instead will HAVE to fix it.
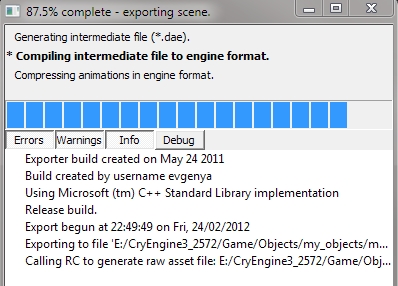
Just click on “Export Model” again (with the Cry Validate window still up) and the model will be exported. The compiler window will briefly pop up and vanish once the export is done.
If it doesn’t disappear on its own, then it means there’s something wrong with the model. In that case, try to make sense out of the error messages! 
After the export you’ll find those files in the export directory:
The important files are the first two ones. The others are log and intermediary files (don’t worry about those).
4) Load the character in Sandbox:
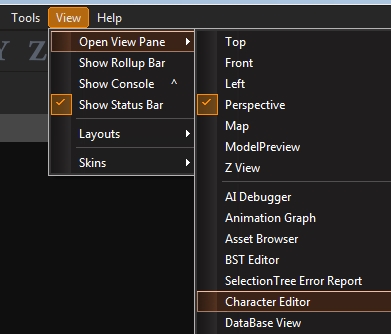
Open Sandbox, then open the Character Editor (from the View->Open View Pane sub-menu).
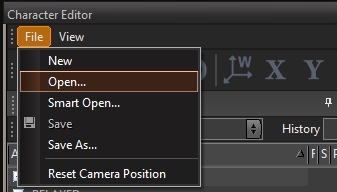
Then load your character by clicking on “File->Open“.
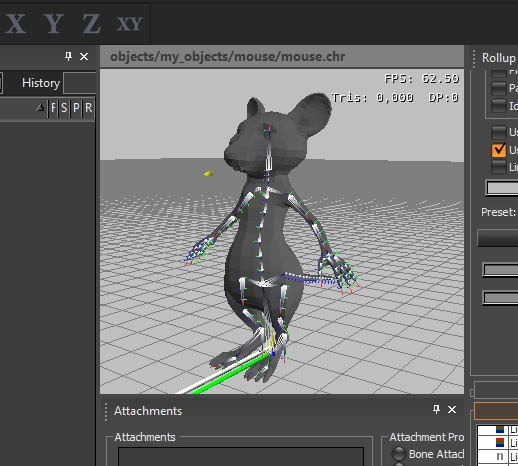
Go to the export directory and choose the .chr file you just exported from Maya. If there’s no problem the file will load and appear in the preview window.
Here I went to the Debug Options part (in the lower right corner of the Character Editor) and checked the “Show Skeleton” check box to make sure everything exported fine.
At this point you can also check if the LookIK works by checking the corresponding check box. The character should now follow you with its head when you move around with the camera.
Hope it helps! The next tutorial will deal with exporting animations…





@Serhat
Yes, absolutely. In theory that should work.