New tutorial about parallax mapping in Crysis
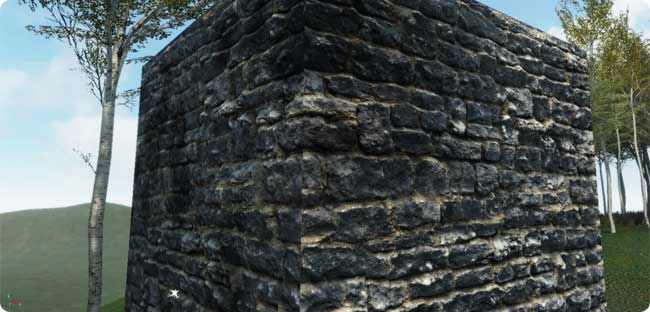
Here’s a little tutorial about creating a texture with parallax mapping for the Crysis engine. This is the effect that makes the textures feel like they’re in relief and you could almost touch them! I first saw that effect in “The Elders Scrolls: Oblivion” and was blown away by the level of realism it does add to what are essentially flat polygons. So enjoy!
very cool. Whats the best workflow for creating textures/materials in maya and perserving them while exporting to sandbox? Or should the materials and textures be added in sandbox afterward?
thanks
The best way is to actually work on the shaders from within sandbox2. The only important thing to do in Maya is to assign proper UVs and shaders to the right meshes (with names you’ll easily recognize in Sandbox2’s material editor). And tweak away from here. If you want to at least keep the maps’ paths when you export, make sure the textures you assign in Maya are located in “…/Game/Objects/my_objects/object_you_export” (within your Crysis Wars folder).